This article contains affiliate links. We may earn a commission from qualifying purchases.
Some content on this site is AI-assisted and reviewed by our editorial team.
Why Coloring Inside the Lines Matters More Than You Think
If you have ever watched someone fill in a coloring page with smooth, even color that stays perfectly within the borders and thought “how do they do that,” you are not alone. Coloring inside the lines is not about perfectionism or being type A. It is about control, and control comes from understanding a handful of simple techniques that anyone can learn.
Disclosure: As an Amazon Associate, ColoredCalm earns from qualifying purchases. This post contains affiliate links, which means we may earn a commission if you click through and make a purchase, at no additional cost to you.
The good news: clean coloring is a skill, not a talent. It comes down to how you hold your pencil, how much pressure you apply, which tools you pick for each section, and a few practical tricks that make tight spaces and long edges much easier to manage. This guide breaks all of that down so your next coloring page looks polished, not patchy.
Start With the Right Grip
Your grip sets the foundation for everything else. Most people color the same way they write, with a tight tripod grip near the tip of the pencil. That works for handwriting, where you need precision on small letters. But for coloring, it creates two problems: your hand tires quickly, and you end up pressing too hard.
Instead, try choking up on the pencil. Hold it about an inch or two higher than you normally would. This gives you a lighter touch, wider strokes, and more control over edges because you are steering with your whole arm rather than just your fingers. For large open areas, you can even use a grip similar to holding a paintbrush, relaxed, with the pencil resting against your index finger and held loosely between your thumb and middle finger.
For tight corners and tiny details, switch back to your normal writing grip temporarily. What works best is switching grips depending on the section, not using one grip for the entire page.
Control Your Pressure (This Is the Big One)
Pressure is the single biggest factor in whether your coloring looks smooth or streaky. Most beginners press too hard. It feels like pressing harder gives you more control, but the opposite is true, heavy pressure creates dark streaks, tears up the paper surface, and makes it impossible to blend or fix mistakes.
Aim for a consistent, light to medium pressure. Think of it like this: if you can hear the pencil scratching loudly against the paper, you are pressing too hard. A well-sharpened pencil on decent paper should glide almost silently. The color should build up in layers, not slam down in one pass.
The Two-Layer Method
Here is a simple system that works for almost any area:
- First pass: Color the entire section with very light pressure. You will see faint, even color with the paper texture still visible underneath. This fills the area quickly and gives you a clean base.
- Second pass: Go over the same area with slightly more pressure, focusing on any spots where the first layer looked uneven or where the paper grain left tiny white gaps. The second layer smooths everything out and deepens the color.
This two-layer approach solves two common problems at once: streaking (because the second layer evens out the first) and going outside the lines (because your first pass at low pressure is forgiving and easy to correct).
Color Direction Matters: Work From the Edge Inward
When you color a large area, start at the border of the shape and work toward the center. Why? Because the edge is where you are most likely to cross the line. If you start at the edge with your most careful strokes, the rest of the fill is easy, you are just widening a band of color that is already anchored to the boundary.
If you start from the center and work outward, you have to slow down and be careful exactly when you reach the edge, which is the hardest moment to maintain control. Starting at the edge means your careful work happens first, when your hand is fresh and focused.
Pick the Right Tool for Each Section
Not every section of a coloring page should be filled with the same tool. Matching your tool to the size and shape of each area makes clean coloring much easier.
Small Details and Tight Corners
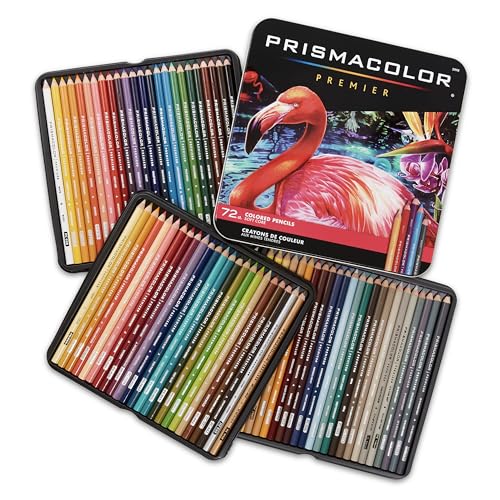
For tiny areas, flower centers, narrow borders, intricate patterns, reach for a fine-tip colored pencil like Prismacolor Premier sharpened to a long point, or use fine-tip markers. A dull pencil tip in a tiny space guarantees you will color outside the line, because the pencil point is wider than the area you are trying to fill.
Medium Areas
Standard coloring areas, leaves, petals, clothing sections, work well with a medium-soft pencil like Arteza Professional. The softer core fills smoothly without needing heavy pressure, and a normal sharp point gives you enough precision for the borders.
Large Open Areas
Big sections like backgrounds and skies are where markers or broad-stroke pencils shine. Alcohol markers like Ohuhu Honolulu cover large areas fast with even color, but you need to be careful at the edges because markers do not forgive mistakes. If you prefer pencils, use the side of a slightly dulled pencil tip for broad, even strokes.
Keep Your Pencils Sharp (Seriously)
A sharp pencil is your best friend for coloring inside the lines. When your pencil gets dull, two things happen: the tip becomes wider than the space you are trying to color, and you have to press harder to transfer color. Both of these make you more likely to cross boundaries.
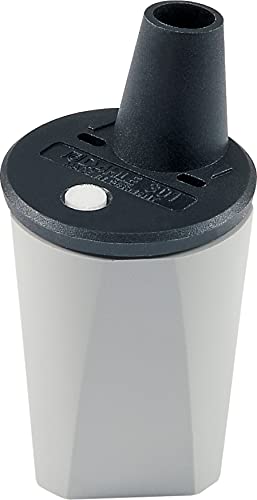
Sharpen frequently, after every few sections, or whenever the tip starts to round. A quality sharpener like the Dahle 301 gives you a consistent long point without breaking leads. Avoid cheap sharpeners that chew up the wood and leave an uneven tip.
For a long, fine point that reaches into tight spaces, try a Kum AS2M long-point sharpener. The two-stage sharpening process gives you a needle-sharp tip that is perfect for detail work.
Use a Hand Guard or Scrap Paper
One sneaky way coloring gets messy: your hand smears color from an already-colored section onto an uncolored area. This is especially common with soft pencils and marker ink that has not fully dried.
The fix is simple. Place a clean sheet of scrap paper under your coloring hand as you work. This protects finished areas from smudging and also gives you a steadier surface to rest on. Some colorists use a folding hand guard or bridge, a tool that rests on the page and lets your hand hover above the artwork without touching it.
Rotate the Page, Not Your Wrist
When you need to color along a curved or diagonal line, most people twist their wrist into uncomfortable positions. This reduces control and leads to wobbly, uneven strokes.
Instead, rotate the coloring page itself. Most coloring books and loose pages are easy to turn as you work. Position each section so your strokes go in the most natural direction, usually left to right for right-handed colorists, right to left for lefties. When the angle changes, spin the page rather than straining your wrist.
Fix Small Mistakes Without Starting Over
Even with perfect technique, you will occasionally cross a line. That is normal. The question is how you handle it.
For pencil, a kneaded eraser can lift light color without damaging the paper. Gently dab (do not rub) the area to pick up pigment. For darker marks, you may need to lift color gradually with several light dabs rather than one aggressive pass.
For marker, correction is harder. A white gel pen can cover small slips on light backgrounds. On dark backgrounds, you can sometimes go over the mistake with a darker marker to blend it into the colored area. The best strategy with markers is prevention: go slowly at borders and leave a tiny gap rather than trying to color right up to the edge.
The Bottom Line
Coloring inside the lines is not about being a perfectionist. It is about working with the right grip, light pressure, sharp tools, and a few smart habits that make clean results much easier to achieve. Start at the edges, use the two-layer method, rotate the page instead of your wrist, and keep scrap paper under your hand. Small adjustments like these can transform your coloring from frustrating to satisfying, and your finished pages will show the difference.
n
Not a Prime member yet? Get FREE 2-day shipping on millions of items, plus access to Prime Video, Prime Music, and Prime Reading. Start your 30-day Prime free trial
Bottom Line
Coloring inside the lines is a technique, not a talent. Slow down, use the right pressure, and let the pencil tip do the work. With practice, your lines will get cleaner and your coloring more satisfying.
🎨 Get Your Free Stress Relief Coloring Guide
Join our newsletter and get this free printable plus weekly tips.
Price Check
Prices verified via our product tracker. Updated Sep 27.
| Amazon.com : Prismacolor Premier Colored Pencils, Soft Cor | $74.99 | 4.8★ (29,632) |
| Amazon.com: ARTEZA Colored Pencils, 48 Wax-Based Color Pen | $0.79 | 4.7★ (6,573) |
| Amazon.com : Ohuhu Alcohol Markers 48 Colors Brush& Chisel | $49.99 | 4.8★ (17,024) |
| Amazon.com : Dahle 301 Precision Lead Pointer Sharpener fo | $20.25 | 3.9★ (2,017) |
| Amazon.com: AS2M (1053121), Long Point Sharpener, sharpens | $8.14 | 4.6★ (2,983) |
| Amazon.com: Faber-Castell Kneadable Eraser for Artists in | $35.00 | 4.7★ (21,212) |
As an Amazon Associate we earn from qualifying purchases.